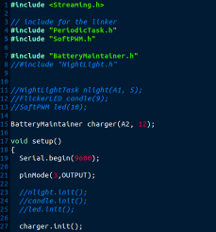
If you do any coding whatsoever – either for a website, your blog or an Arduino, you have seen code blocks in a web page. Every now and then I need to do the same in this website. My first thought was – this is WordPress, the most popular blogging software in the world. The functionality I need is either built-in or a plug-in is readily available. While I found that belief to be true, it was not nearly as easy as I had expected it to be. Instead of readily finding a quick and simple solution, I found a lot of confusing and non-working ideas and articles. I have put together what I consider a simple and straightforward solution which I will detail here. It requires two plugins and is a WYSIWYG implementation.
Fixing TinyMCE
The first thing you must do is to make some changes to the default TinyMCE configuration. This is the editor called Visual in your WordPress admin page. This is easily done with a very safe plugin called Visual Code Editor. This plugin basically facilitates writing code in the TinyMCE editor. Some of its more necessary features are:
- Adds
<pre>and<code>to block format menu - Allows extra attributes for compatibility in some syntax highlighters (ie,
<pre lang="php" line='5'>)
Without this plugin, TinyMCE might strip out the html code you need to present your code blocks. This plugin is so simple, consisting of a few WordPress filters, that I just copied out the code itself and pasted it into my functions.php file. After pasting it, I changed the block format menu to suit my needs better. Here is what I ended up with:
// Modify Tiny_MCE init
add_filter('tiny_mce_before_init', 'smartenTinyMCE' );
function smartenTinyMCE($init) {
    // Add PRE and CODE to the block formats menu
    $init['theme_advanced_blockformats'] = 'h2,h3,h4,h5,h6,p,blockquote,pre,code';

    // Allow extra attributes for some syntax highlighters, IE: <pre lang="php" line="5">...</pre)
    // Allow iFrames for live examples
    $init['extended_valid_elements'] = 'pre[*],code[*],iframe[*]';

    return $init;
}
In my version, I took out the <h1> since I never used it, and added the <blockquote> tag. If you make your own customizations, after saving your changes you will see your version in the Visual Editor’s Format menu after refreshing your Edit Post page.
Now if you want to add some html attributes to your <pre> or <code> tags, you can’t easily do that in the TinyMCE editor. This plugin code however, now permits you to switch to the HTML editor (the tab next to the Visual tab). Locate your <pre> and <code> tags there and add your attributes such as a CSS class or a language if you plan to use a Syntax Highlighter (more it that subject in a bit).
<Code> or <Pre>
The next problem I had was whether to use the <code> or <pre> tags. I naïvely assumed that the <code> tag was for code blocks. After banging my head against the wall several times whenever I tried to style code blocks with the <code> tag and getting very bad results from TinyMCE, I learned that the <pre> tag should be used for code blocks, and the <code> tag should be used for inline code. It is analogous to using <div> or <p> tags for a multi-line block of text and the <span> tag for text within a line. Once I started using <pre> for my multi-line blocks of code, everything was well with my WordPress world. I could edit my code in either editor and it stayed just as I wanted it.
Styling Your Code
The last step to displaying beautiful code blocks in your blog posts is styling them read here. Your CSS defaults will use a monospace font and the <pre> tag will ensure your spacing and line breaks are just as you wrote them. At this point you can either just write some custom CSS for displaying these blocks in a different foreground and background color, or you can make use of a Syntax Highlighter. Syntax Highlighters are a powerful code module that will color your code syntax depending on the language you are using – just like your code editor does. It will also optionally add line numbers to your code block as well.
There are several Syntax Highlighters available for WordPress. The one I settled on is called Better WordPress Syntax Highlighter. After installing its plugin, you must add a language attribute to your <pre> and <code> tags to specify the language you are using. This plugin supports 17 languages and you can even add your own. It doesn’t have C++ (amazingly), but does support CSharp which seems close enough for Arduino code. You can also specify other custom attributes to more precisely specify this plugin’s options.
Here’s an example:
<pre lang="csharp" extra="5">some code...</pre>
My syntax will be highlighted for the CSharp/C++ language, and the extra attribute will highlight line number 5. I did find that I needed to also add this section to my style.css file in order to get the highlighting to show:
/* class used by BWP syntax plugin for highlighted line */
.ln-xtra {
    background-color: lightgreen;
}
You’ll want to specify your own color scheme of course. If you are using the Firefox browser, you will want to make sure you are using the Firebug plugin to examine your CSS and customize it to suit your own needs.
Conclusion
That is all there is to it. If you follow my steps you will be adding code blocks to your WordPress posts in no time. Everything is easily customizable, even down to your own language syntax coloring. You can also choose a different syntax highlighter if you wish. Just search for the term Syntax in the WordPress plugins page and find one that suits you better.
Please add your own discoveries and observations in the comments below.
How to Insert Code into Your WordPress Blog by Provide Your Own is licensed under a Creative Commons Attribution-ShareAlike 4.0 International License.


